The delightful world of succulent pots awaits you, where creativity and greenery intertwine to bring a touch of charm to your home decor. In this article, we invite you to embark on a journey of DIY succulent pot ideas that will inspire you to transform ordinary planters into extraordinary works of art. Discover many imaginative ways to showcase your favorite succulents, from repurposed containers to innovative designs. Let your imagination run wild as you explore unique materials, captivating colors, and eye-catching textures to spruce up your living space with a personalized touch of nature’s beauty. Get ready to unleash your inner artist and cultivate a home filled with stylish, succulent displays that enchant guests and yourself.
Painted Terra Cotta Pots
Terra cotta pots are a classic choice for housing succulents, but why settle for plain terracotta when you can give them a personalized touch with a splash of paint? With just a few materials and some creativity, you can transform these humble pots into works of art that will add a pop of color to any space.
Materials needed
To get started on your painted terra cotta pot project, you’ll need the following materials:
- Terra cotta pots: Choose various sizes, depending on your preference and the number of succulents you intend to plant.
- Paint: Opt for outdoor acrylic paint that is both waterproof and durable.
- Brushes: Select brushes of different sizes for precision and broad strokes.
- Painter’s tape: Use this to create clean, straight lines to incorporate designs or patterns.
- Sealant: Apply a waterproof sealant to protect the paint from fading and the pot from moisture damage.
Step 1: Clean and prepare the pots
Before you begin painting, cleaning the terra cotta pots is essential to ensure proper paint adhesion. Start by wiping any dirt or debris from the surface with a clean cloth or sponge. You can also use a mild soap and water solution for stubborn stains. Allow the pots to dry completely before moving on to the next step.
Step 2: Prime the pots (optional)
While priming is unnecessary, applying a coat of primer can help the paint adhere better and create a smooth surface. If you choose to prime, select a primer suitable for terra cotta and follow the manufacturer’s instructions for application. Allow the primer to dry according to the recommended drying time before proceeding.
Step 3: Paint the pots
Now comes the fun part—painting the pots! Use your creativity to create unique designs, whether it’s a solid color, geometric patterns, or even intricate illustrations. Start by applying a base coat of paint and allowing it to dry completely before adding additional layers or details. If you’re incorporating multiple colors, use painter’s tape to create clean lines and prevent bleeding. Let your imagination run wild, and have fun with it!
Step 4: Add finishing touches
Once the paint has dried, it’s time to add some finishing touches to your painted terra cotta pots. You can choose to leave them as is or apply a waterproof sealant to protect the paint and extend the longevity of your masterpiece. Additionally, consider adding embellishments such as decorative stones, shells, or even small trinkets to enhance the visual appeal of your pots further. Place your succulents inside the pots and proudly display your hand-painted creations!
Mason Jar Succulent Planters
Repurposing mason jars as succulent planters is a trendy and eco-friendly way to bring a touch of rustic charm to your home. With their transparent glass walls, mason jars allow you to see the intricate root systems of your succulents while providing a visually appealing display.
Materials needed
To create your mason jar succulent planters, gather the following materials:
- Mason jars: Choose jars of different sizes and shapes to add diversity to your collection.
- Succulent soil: Use well-draining soil specially formulated for succulents and cacti.
- Succulent plants: Select a variety of succulents that suit your aesthetic preferences.
- Gravel or pebbles: These will help with drainage and prevent excess water buildup.
- Decorative elements (optional): Feel free to add decorative elements such as colored sand, moss, or small figurines.
Step 1: Prepare the mason jars
Start by cleaning the mason jars to remove dirt or residue. Wash them with warm, soapy water, rinse thoroughly, and allow them to dry completely. You can also remove any labels or adhesive using a mixture of equal parts vinegar and water or by applying a commercial adhesive remover. Ensure the jars are completely clean before proceeding to the next step.
Step 2: Add drainage holes (optional)
While mason jars do not have built-in drainage holes, it’s essential to provide a way for excess water to escape. You can either drill small holes in the bottom of the jars or add a layer of gravel or pebbles to create a drainage system. This will prevent your succulents from sitting in water, which can cause root rot.
Step 3: Fill the jars with soil
Fill the mason jars with well-draining succulent soil, leaving enough space for your succulents’ root systems. Gently pat down the soil to ensure it’s secure but not compacted. Make sure to leave at least half an inch of space between the soil surface and the rim of the jar to prevent water overflow during watering.
Step 4: Plant the succulents
Carefully remove your succulents from their nursery pots and gently loosen the roots to promote healthy growth. Create a small hole in the soil, place the succulent in the hole, and backfill with additional soil until the succulent is securely in place. Repeat this process for each succulent, ensuring they are evenly spaced and have enough room to grow.
Step 5: Maintain and care for the plants
Once your mason jar succulent planters are planted, providing them with proper care to thrive is essential. Succulents prefer bright, indirect sunlight, so place your planters in a well-lit area, such as a windowsill. Water sparingly, allowing the soil to dry out between waterings, as overwatering can lead to root rot. Remember also to monitor the health of your succulents and adjust their care accordingly, including occasional fertilization and removing any dead or dying leaves.
Hanging Succulent Balls
Hanging succulent balls are the perfect choice if you want to add a unique and eye-catching element to your indoor or outdoor space. These whimsical creations creatively showcase your succulents and add a touch of natural beauty to any setting.
Materials needed
To create your hanging succulent balls, gather the following materials:
- Wireframe or hanging basket: Choose a frame or basket that fits your desired size and aesthetic.
- Sphagnum moss: This will serve as the substrate for your succulents and aid in moisture retention.
- Succulent cuttings or small plants: Use a variety of succulents with different textures and colors.
- Fishing line or plant ties: These will secure the succulents to the wire frame.
- Water mister: This will help water your succulent balls without over-saturating them.
Step 1: Prepare the wireframe
First, ensure your wire frame or hanging basket is clean and free of sharp or protruding edges. You can also cover it with twine or jute rope for a more rustic look. This will create a foundation for your succulents to grow and intertwine.
Step 2: Attach the succulents
Soak the sphagnum moss in water until it becomes pliable and moist. Take handfuls of the moss and tightly pack it into the wireframe, leaving a hollow center. Ensure that the moss is tightly secured and evenly distributed throughout the frame. Once the moss is in place, you can start attaching your succulents. Use fishing lines or plant ties to secure each succulent to the moss, allowing them to intertwine and create a lush, cascading effect.
Step 3: Water and hang the succulent balls
After attaching all the succulents, mist the entire ball with water to moisten the moss and succulents. Hang your succulent balls in an area that receives bright, indirect sunlight. Ensure they are placed where they can be easily accessed for watering and maintenance.
Step 4: Maintain and care for the plants
Hanging succulent balls require regular maintenance to ensure their health and longevity. Check the moisture level of the moss regularly and mist if necessary, making sure not to overwater. Rotate the balls periodically to ensure all sides receive equal sunlight exposure. Monitor the health of the succulents, removing any dead or dying leaves promptly. Your hanging succulent balls will become captivating living artworks with proper care and attention.
Upcycled Tin Can Planters
Upcycling tin cans into planters is a fantastic way to add a touch of charm and sustainability to your succulent collection. These repurposed containers give a second life to what would otherwise be discarded and bring a unique element to your indoor or outdoor space.
Materials needed
To create your own upcycled tin can planters, gather the following materials:
- Tin cans: Collect various-sized tin cans from your kitchen or recycle center. Make sure to clean them thoroughly and remove any labels or sharp edges.
- Drill or hammer and nail: These tools create drainage holes in the tin cans.
- Paint or decorative materials: Get creative and add your personal touch by painting the tin cans or using decoupage techniques, stickers, or decorative tape.
- Succulent soil: Use a well-draining soil specifically formulated for succulents and cacti.
- Succulent plants: Select a variety of succulents that thrive in the conditions of your chosen location.
Step 1: Clean and prepare the tin cans
Start by thoroughly cleaning the tin cans removing any residue, paint, or labels. Use warm, soapy water or adhesive remover to ensure they are clean and safe for housing your succulents. Rinse the cans well and allow them to dry before moving on to the next steps.
Step 2: Create drainage holes
Proper drainage is crucial for the health of your succulents, so it’s essential to create drainage holes in the bottom of the tin cans. Use a drill with a tiny drill bit or a hammer and nail to puncture a few holes in the bottom. This will allow excess water to drain and prevent the roots from sitting in stagnant water.
Step 3: Paint or decorate the cans
Here comes the fun part – adding your personal touch to the tin cans! You can let your creativity shine by painting them in vibrant colors or patterns that match your décor style. Alternatively, you can use decoupage techniques to apply decorative paper, fabric, or even photos to the cans. Feel free to experiment with different materials and techniques to make your upcycled tin can planters unique.
Step 4: Fill with soil and plant succulents
Fill each tin can with well-draining succulent soil, leaving enough space for the roots of your chosen succulents. Gently remove the succulents from their nursery pots, loosen the roots, and plant them in the tin cans. Backfill with additional soil, ensuring the plants are firmly in place but not overpacked.
Step 5: Water and care for the plants
Once your upcycled tin can planters are ready, they must provide regular care to ensure their well-being. Please place them in an area with bright, indirect sunlight, as succulents thrive in these conditions. Water sparingly, allowing the soil to dry out between waterings to prevent overwatering. Regularly monitor the health of your plants, removing any dead or dying leaves and adjusting their care as necessary.
Teacup Succulent Garden
Teacup succulent gardens are a delightful way to breathe new life into vintage teacups while bringing a touch of whimsy to your home or garden. These miniature gardens make charming centerpieces or accents for any space and allow you to showcase your green thumb in a unique and eye-catching way.
Materials needed
To create your teacup succulent garden, gather the following materials:
- Teacups or small porcelain containers: Look for vintage teacups or small porcelain containers with drainage holes, or create your own drainage system.
- Succulent soil: Use a well-draining soil specifically formulated for succulents and cacti.
- Succulent plants: Select a variety of succulents that fit well in the teacups and enjoy similar light and watering needs.
- Decorative elements (optional): Consider adding decorative elements such as small figurines, colored sand, or moss to enhance the visual appeal.
Step 1: Choose the teacups
Start by selecting teacups or small porcelain containers with drainage holes or small enough to create your own drainage system. Vintage teacups lend a charming and whimsical touch, but you can choose new or modern options that suit your style.
Step 2: Add drainage holes
If your teacups or porcelain containers do not have drainage holes, creating a way for excess water to escape is essential. You can use a drill with a tiny drill bit to carefully develop holes in the bottom of the cups. If drilling is not an option, consider adding a layer of pebbles at the bottom of the teacup to create a reservoir where excess water can collect.
Step 3: Fill with succulent soil
Fill each teacup with well-draining succulent soil, leaving enough space for the succulents’ root systems. Gently pat down the soil to ensure no air pockets, but avoid compacting it too tightly.
Step 4: Plant the succulents
Remove your chosen succulents from their nursery pots and gently loosen the roots. Create small holes in the soil of the teacup, place the succulents in the holes, and backfill with additional soil until the plants are securely in place. Arrange the succulents in a pleasing composition, considering their growth patterns and colors.
Step 5: Water and care for the garden
Water your teacup succulent garden sparingly, allowing the soil to dry out between waterings. Be mindful not to overwater, as succulents are susceptible to root rot. Place the teacup garden in a location that receives bright, indirect sunlight, as succulents thrive in these conditions. Regularly monitor the health of your succulents, removing any dead or dying leaves, and adjust their care as necessary.
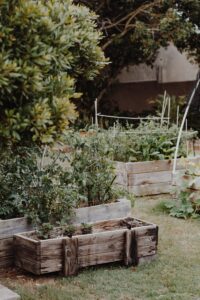
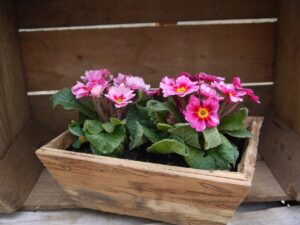
Wooden Box Succulent Planter
A succulent wooden box planter adds rustic beauty and elegance to any setting. With a few materials and some basic woodworking skills, you can create a delightful centerpiece or accent piece that showcases your succulent collection in style.
Materials needed
To create your wooden box succulent planter, gather the following materials:
- Wooden box or planter: Choose a wooden box or planter that fits your desired size and aesthetic preferences. You can either purchase a pre-made planter or build one yourself.
- Succulent soil: Use a well-draining soil specifically formulated for succulents and cacti.
- Succulent plants: Select a variety of succulents that fit well in the planter and enjoy similar light and watering needs.
- Landscape fabric: This will line the wooden box and prevent soil erosion while allowing water to pass through.
- Drill or hammer and nails: If necessary, use these tools to create drainage holes in the bottom of the box.
Step 1: Choose or build a wooden box
Select a wooden box or planter that suits your style and desired dimensions. Alternatively, if you feel crafty, you can build a wooden box using reclaimed or repurposed wood. Ensure that the box has enough depth to accommodate the root systems of your chosen succulents.
Step 2: Add drainage holes (if necessary)
Consider adding drainage holes to the bottom of the wooden box for proper drainage. You can create these holes using a drill with a small drill bit or a hammer and nails. If the box is made of reclaimed wood, ensure that the holes are large enough for excess water to escape without becoming blocked.
Step 3: Line the box with landscape fabric
To prevent soil erosion and retain moisture, line the interior of the wooden box or planter with landscape fabric. This will allow water to pass through while keeping the soil intact. Cut the fabric to fit the dimensions of the box and secure it in place using staples or adhesive, ensuring that it covers the entire interior surface.
Step 4: Fill with succulent soil
Fill the wooden box with well-draining succulent soil, leaving enough space for the succulents’ root systems. Gently pat down the soil to ensure no air pockets, but avoid compacting it too tightly. Ensure the soil level is appropriate to accommodate the height of your succulents.
Step 5: Plant the succulents
Remove your chosen succulents from their nursery pots, gently loosen the roots, and carefully place them in the prepared soil. Backfill gaps with additional soil, ensuring the plants are securely in place. Arrange the succulents in a pleasing composition, considering their growth patterns and colors.
Step 6: Maintain and care for the plants
Once your wooden box succulent planter is planted, it’s essential to care for your succulents to thrive properly. Place the planter in a brightly lit area that receives indirect sunlight, as succulents need adequate light to grow and thrive. Water sparingly, allowing the soil to dry out between waterings, as overwatering can cause root rot. Regularly monitor the health of your succulents, removing any dead or dying leaves, and adjust their care accordingly.
Concrete Succulent Pots
Concrete succulent pots are a modern and stylish way to display your succulent collection. Their sleek and minimalist design adds a touch of sophistication to any space. Creating your concrete pots allows you to customize their size, shape, and finish to suit your style.
Materials needed
To create your concrete succulent pots, gather the following materials:
- Concrete mix: Choose a concrete blend suitable for crafting, preferably one that contains aggregates of the size ideal for small pots.
- Containers for molding: To create the pots, use plastic containers or molds of your desired size and shape. These can include food containers, plastic cups, or silicone molds.
- Cooking spray or release agent prevents the concrete from sticking to the mold.
- Reinforcement materials (optional): Depending on the size and shape of the pots, you may require reinforcement materials such as wire mesh or fiberglass mesh.
- Sandpaper or concrete finishing tools: These will be used to smooth and shape the pots.
- Sealant: Apply a concrete sealant to protect and enhance the appearance of the finished pots.
Step 1: Prepare the mold
Start by selecting suitable containers or molds to create the shape and size of your desired concrete pots. Ensure that they are clean and free of any debris. If using plastic containers, coat the interior with cooking spray or apply a release agent to prevent the concrete from sticking to the mold.
Step 2: Mix and pour the concrete
Follow the instructions provided with your chosen concrete mix to prepare the mixture. Add reinforcement materials such as wire mesh or fiberglass mesh to provide additional strength if desired. Pour the concrete into the mold, ensuring it reaches all corners and edges. Tap the mold gently on a flat surface to remove any air pockets and level the surface.
Step 3: Create drainage holes (optional)
While the concrete is still wet, you can create drainage holes by using a straw or pencil to indent the bottom of the pot. These holes will allow excess water to escape, preventing root rot in your succulents.
Step 4: Cure and de-mold the pots
Cover the mold with plastic wrap or a plastic bag to prevent rapid drying. This will promote the curing process by retaining moisture. Allow the concrete to cure for at least 24 to 48 hours per the manufacturer’s instructions. Once cured, carefully remove the pots from the mold. If you encounter any resistance, gently tap the sides of the mold to release the pots.
Step 5: Plant the succulents
After demolding the pots, prepare them for planting by sanding any rough edges or imperfections using sandpaper or concrete finishing tools. Ensure the pots are completely clean and dry before adding soil and planting succulents. Fill the pots with well-draining succulent soil, leaving enough space for the roots. Plant your chosen succulents and gently pat down the soil to secure them in place.
Step 6: Water and care for the plants
Water your newly potted succulents sparingly, allowing the soil to dry between waterings. Ensure the pots are placed in a location that receives bright, indirect sunlight, as succulents require adequate light to thrive. Monitor the plants’ health and adjust their care as necessary, promptly removing any dead or dying leaves. If desired, apply a concrete sealant to protect the pots and enhance their appearance.
Wine Cork Succulent Magnets
Wine cork succulent magnets are a creative and eco-friendly way to repurpose wine corks and bring a touch of nature to your fridge or magnetic board. This DIY project lets you combine your love for succulents and recycling while creating functional and decorative magnets.
Materials needed
To create your own wine cork succulent magnets, gather the following materials:
- Wine corks: Collect or purchase used wine corks from a craft store.
- Sharp knife or craft drill: This tool can hollow out the wine corks.
- Succulent cuttings: Choose succulent or small plants that fit within the hollowed wine corks.
- Hot glue gun and glue sticks: These will be used to secure the succulents inside the wine corks.
- Neodymium magnets: Use rare-earth solid magnets to ensure the magnets hold securely to metal surfaces.
- Adhesive or thin wire: Use these to attach the magnets to the wine corks.
- Decorative elements (optional): Consider adding decorative elements such as moss or small pebbles for added visual appeal.
Step 1: Gather wine corks
Start by collecting wine corks. Ensure they are clean and dry before moving on to the next steps. Give the corks a gentle wipe to remove any dirt or residue if needed.
Step 2: Hollow out the cork
Using a sharp knife or craft drill, carefully hollow out the center of each wine cork. Create a cavity large enough to accommodate the succulent cuttings or small plants. Be cautious when working with sharp tools, and take your time to avoid any accidents.
Step 3: Secure succulents in the cork
Apply hot glue to the bottom of the cavity and gently press the succulent cuttings or small plants into the adhesive. Hold them in place until the glue sets and the succulents are secure. Ensure the succulent stems are inserted deep enough into the cork for stability.
Step 4: Attach magnets
Apply adhesive to the backside of the magnets or use thin wire to create loops that securely hold the magnets. Attach the magnets using the adhesive or thread the wire through the cork and secure it at the back. Allow the glue to dry completely, or ensure the wire is tightly secured.
Step 5: Display and care for the magnets
Once the succulent magnets are complete, you can display them on your fridge, magnetic board, or any metal surface. Ensure the magnets are strong enough to hold the chosen surface securely. While these magnets do not require any direct care, be mindful not to expose them to excessive moisture or direct sunlight, as this can cause damage to the succulents. Enjoy the beauty of your wine cork succulent magnets, and consider creating more to gift to friends and loved ones.
Driftwood Succulent Planter
Driftwood succulent planters uniquely showcase your succulents while bringing nature’s beauty to your indoor or outdoor space. These natural and artistic planters add a rustic and organic element to any setting, making them a perfect choice for succulent lovers who appreciate the beauty of simplicity.
Materials needed
To create your driftwood succulent planter, gather the following materials:
- Driftwood: Look for driftwood pieces that suit your aesthetic preferences and have notches or indentations suitable for planting succulents.
- Epoxy adhesive or hot glue gun: Use these to secure the succulents to the driftwood.
- Succulent cuttings or small plants: Choose succulent varieties that fit within the apertures or indentations of the driftwood.
- Sandpaper or a wire brush will help smoothen and clean the driftwood.
- Landscape fabric or sphagnum moss: Use these to line the driftwood and provide a substrate for the succulents.
- Fishing lines or small plant ties will secure the landscape fabric or moss and prevent it from shifting.
Step 1: Find or prepare the driftwood
Start by finding or preparing the driftwood for planting. If you’re fortunate enough to find driftwood pieces washed ashore, thoroughly clean them with fresh water and remove any loose debris or salt residue. If you’re using driftwood acquired from another source, ensure it is dry and free from pests or mold.
Step 2: Prepare the driftwood for planting
Inspect the driftwood and identify suitable crevices or indentations for planting succulents. Use sandpaper or a wire brush to smoothen any rough edges or surfaces if necessary. This will prevent damage to the succulents and provide a more attractive presentation. If the driftwood has sharp or protruding edges, ensure it is sanded down to avoid injury during planting or future handling.
Step 3: Plant the succulents
Line the notches or indentations of the driftwood with landscape fabric or sphagnum moss. This will create a substrate for the succulents and help retain moisture. Insert the succulent cuttings or small plants into the prepared spaces, using epoxy adhesive or a hot glue gun to secure them. Ensure the succulents are firmly and securely attached to prevent accidental dislodging.
Step 4: Water and care for the plants
Once your driftwood succulent planter is complete, proper care is important to ensure the health and longevity of your succulents. Place the planter in a location that receives bright, indirect sunlight. Water sparingly, allowing the soil or moss to dry out between waterings to prevent overwatering. Regularly monitor the health of your succulents, removing any dead or dying leaves and adjusting their care accordingly.
Vertical Succulent Wall Art
Vertical succulent wall art is a stunning way to create a living masterpiece that showcases your succulents and adds a dramatic focal point to any interior or exterior wall. Whether you’re aiming for a small accent piece or a grand living wall, this DIY project allows you to unleash your creativity while bringing the beauty of nature indoors.
Materials needed
To create your own vertical succulent wall art, gather the following materials:
- Vertical frame or structure: Choose a frame or structure suitable for mounting on a wall. This can be a shadow box, picture frame, or a custom-built structure.
- Succulent cuttings or small plants: Select a variety of succulents that suit your aesthetic preferences and will thrive in the growing conditions of the wall art.
- Landscape fabric: This will line the frame and hold the soil in place while allowing water to pass through.
- Soil or growing medium: Use a specially formulated soil or growing medium that provides proper drainage and aeration for the succulents’ root systems.
- Chicken wire or mesh will support the succulents and help retain the soil within the frame.
- Staple gun or wire: Use these to secure the frame’s landscape fabric, mesh, and succulents.
Step 1: Choose a vertical frame
Select a suitable frame or structure for your vertical succulent wall art. This can be a pre-made shadow box or picture frame or a custom-built structure made from wood or metal. Ensure the frame is sturdy and capable of supporting the weight of the soil, plants, and other decorative elements.
Step 2: Prepare the frame
Line the frame’s interior with landscape fabric, leaving some excess fabric to fold over the backside of the frame. This will keep the soil in place while allowing water to drain through. Attach the fabric securely to the frame using a staple gun or wire, ensuring no gaps or areas where soil can escape.
Step 3: Attach succulents to the frame
Prepare the succulents by gently removing them from their nursery pots and loosening the roots. Create small punctures or slits in the landscape fabric and insert the succulents, ensuring that the roots are securely nestled within the soil or growing medium. Space the succulents according to your desired pattern or design, allowing room for growth.
Step 4: Hang and care for the wall art
Once your vertical succulent wall art is complete, it’s time to hang it in a location that receives adequate sunlight. Ideally, please place it in a spot that receives bright, indirect sunlight, as succulents require light to thrive. Water the wall art sparingly, ensuring the soil is arid before each watering to prevent overwatering. Monitor the health of the succulents and adjust their care accordingly, including occasional fertilization and removing any dead or dying leaves. Enjoy the beauty of your living masterpiece and showcase your creativity to all who behold it.