In this article, we explore effective methods to enhance seed germination techniques. Achieving successful germination is essential for plant growth and propagation, and by implementing simple yet proven strategies, we can significantly increase our chances of success. From providing optimal conditions for seeds to developing a thorough understanding of their specific requirements, we will uncover the critical steps to improving seed germination and ultimately nurturing thriving plants.
Choosing the Right Seeds
Consider the Climate
When choosing seeds for your garden, consider your region’s climate. Different plants have different temperature and moisture preferences, so selecting well-suited seeds for your climate is crucial for successful germination. Take note of your area’s average temperature and rainfall throughout the year and choose seeds that can thrive in those conditions.
Choose High-Quality Seeds
Investing in high-quality seeds is essential for optimal germination. Look for reputable seed suppliers that offer various seeds known for their viability and reasonable germination rates. High-quality seeds are often properly processed and tested, ensuring they have a higher chance of sprouting into healthy seedlings.
Check Seed Viability
It is a good idea to check your chosen seeds’ viability before sowing. This can be done by performing a simple germination test. Place a small sample of your seeds in a damp paper towel or a seedling tray filled with moist potting soil. Please keep them in a warm location and monitor their progress over some time. If a high percentage of the seeds sprout, it indicates they have good viability and are ready for planting.
Preparing the Soil
Select a Planting Area
Selecting the proper planting area is vital to seed germination success. Choose a location that receives adequate sunlight, as most plants require at least 6-8 hours of direct sunlight daily. Additionally, ensure that the soil in the chosen area is well-draining to prevent soggy conditions that can lead to root rot or other problems.
Remove Weeds and Debris
Before sowing your seeds, it is essential to remove any existing weeds and debris from the planting area. Weeds can compete with your germinating seeds for resources like water, nutrients, and sunlight, hindering their growth. Clearing the debris area also helps create a clean and healthy environment for your seeds to thrive.
Loosen the Soil
Loosening the soil in the planting area is crucial in preparing it for seed germination. Use a garden fork or a trowel to gently break up any compacted soil and create a loose, crumbly texture. This enhances soil aeration and drainage, allowing the seeds to establish healthy root systems.
Providing Proper Watering
Watering Techniques
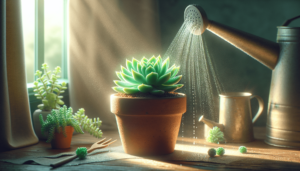
Proper watering is essential for seed germination. When watering, it’s best to use a gentle and fine spray to prevent disturbing or washing the seeds. Mistreating the soil surface for small or delicate seeds can provide sufficient moisture. For larger seeds, water directly at the soil level, aiming to keep the soil evenly moist but not soggy.
Avoid Overwatering
While keeping the soil moist is important, it’s equally important to avoid overwatering. Overwatering can lead to soggy conditions and prevent the seeds from receiving the oxygen they need for germination. Be mindful of the moisture levels in the soil and water only when necessary, allowing the top layer of soil to dry out slightly between waterings.
Maintain Moisture
To ensure successful seed germination, consistent moisture levels in the soil are essential. Depending on the climate and the specific needs of the seeds you’re planting, you may need to monitor the soil moisture daily or every few days. Watering early in the day evaporates excess moisture before evening, reducing the risk of fungal diseases.
Temperature and Light Requirements
Provide Optimal Temperature
Temperature plays a crucial role in seed germination, as different plants have specific temperature requirements for successful sprouting. Knowing the ideal temperature range for the seeds you’re planting and providing suitable conditions are essential. Some seeds may require warmer temperatures and may benefit from using a seedling heat mat to maintain the desired temperature.
Ensure Sufficient Light
Light is also essential for seed germination, as it triggers photosynthesis, which provides energy for the seedling’s growth. Most seeds require light to germinate, while some prefer darkness. It’s essential to research the specific light preferences of the seeds you’re planting and provide the appropriate conditions accordingly.
Supplemental Lighting
In situations where natural light is insufficient, supplemental lighting can be used to ensure optimal seed germination. Fluorescent grow lights or full-spectrum LED lights can provide the necessary light spectrum for seedlings to thrive. Position the lights close to the germinating seeds, ensuring they are exposed to light for 12-16 hours daily.
Scarification
Understanding Scarification
Scarification is a seed treatment method that involves breaking or softening the seed coat, allowing moisture to penetrate and germination to occur more quickly. Some seeds have rigid or impermeable coats that need scarification to improve germination rates. Understanding which seeds require scarification can significantly improve your success in growing certain plant species.
Methods of Scarification
Depending on the hardness of the seed coat, there are several methods of scarification. Physical scarification involves manually nicking or filing the seed coat, while chemical scarification involves treating the seeds with acids or chemicals to break down the coating. Another method is hot water scarification, where seeds are soaked in hot water to soften the seed coat. Research the specific scarification method required for planting seeds to ensure success.
Appropriate Seeds for Scarification
Not all seeds require scarification, but it can significantly enhance germination rates for those that do. Some seeds that benefit from scarification include morning glories, sweet peas, and lupines. Before attempting scarification, it’s essential to research the specific seeds and consult reliable sources or gardening experts to ensure you’re using the correct method.
Stratification
Understanding Stratification
Stratification is a seed treatment technique that involves subjecting seeds to a period of moist chilling. This mimics the natural winter conditions that certain seeds require for their germination. With a period of cold stratification, seeds are triggered to break dormancy and prepare for germination once warmer conditions arrive. Understanding which seeds require stratification can significantly improve their germination rates.
Methods of Stratification
Depending on the specific seeds you’re working with, there are various stratification methods. One standard method is moist stratification, where seeds are placed in a wet medium, such as damp sand or peat moss, and stored in a refrigerator for a prescribed period. Another method is pre-chilling, where seeds are sown outdoors in the fall and naturally undergo the winter stratification process. Research the specific stratification method required for planting seeds to ensure success.
Appropriate Seeds for Stratification
Many plant species, especially those native to colder climates, require a stratification period for successful germination. Seeds that benefit from stratification include some types of perennial flowers, certain tree species, and many fruits, such as apples and pears. It’s important to research the specific seeds you’re planting to determine if they require stratification and, if so, for how long and at what temperature.
Germination Containers
Choosing the Right Container
Choosing a suitable container for seed germination is crucial for providing a suitable environment for the seeds to sprout. Depending on the size and number of seeds you’re germinating, you can choose from various containers, such as seedling trays, peat pots, or even recycled materials like yogurt cups or egg cartons. Consider the container’s depth, size, and drainage capabilities to ensure it meets the needs of your seeds.
Ensuring Proper Drainage
Proper drainage is essential for seed germination’s success. When selecting a container, ensure it has sufficient drainage holes to allow excess water to escape. This prevents water build-up and avoids soggy conditions leading to root rot or fungal diseases. If necessary, add a gravel or perlite layer at the container’s bottom to improve drainage.
Using Biodegradable Containers
Using biodegradable containers can benefit seed germination, as they can be planted directly in the ground without disturbing the fragile seedlings. Materials like peat pots or coir pots are biodegradable and can be easily transplanted with seedlings in the garden. This eliminates the need for transplanting and minimizes the risk of root disturbance.
Germination Medium
Selecting the Ideal Medium
Choosing a suitable germination medium is essential for providing adequate support, moisture, and nutrients to the seeds during germination. Depending on the seeds you’re germinating, you can choose from various options such as seed-starting mix, compost, or a combination of peat moss, vermiculite, and perlite. Research the specific needs of your seeds to determine the ideal germination medium.
Creating a Balanced Mix
Creating a balanced germination medium involves combining different components in the right proportions to provide the optimal growing conditions for your seeds. For example, a mix of peat moss, vermiculite, and perlite can provide good water retention, aeration, and nutrient availability. Experimenting with different ratios and components can help you find the perfect seed combination.
Sterilizing the Medium
Sterilizing the germination medium can help prevent the growth of harmful bacteria, fungi, or pests that can damage the seeds or seedlings. You can sterilize the medium by moistening it, placing it in a microwave-safe container, and heating it in the microwave for a few minutes. Alternatively, you can use an oven or steam sterilization method. Taking this extra step can significantly improve seed germination success.
Applying Bottom Heat
Benefits of Bottom Heat
Applying bottom heat to germinating seeds can provide numerous benefits. Heat aids in better and faster germination by speeding up the biochemical processes inside the seeds. It helps to create optimal soil temperatures necessary for activating enzymes responsible for seed germination. Bottom heat also promotes root growth and overall seedling vigor.
Using Heat Mats
One effective method of providing bottom heat is using heat mats specially designed for seed germination. These mats are placed underneath the germination containers and gently raise the soil’s temperature. Heat mats can be easily controlled and adjusted to maintain the ideal temperature for your seeds.
Other Bottom Heating Methods
If a heat mat is unavailable, other ways exist to provide bottom heat to germinating seeds. Placing the germination containers on top of a radiator or near a heat source can provide a similar effect. However, monitoring the temperature closely is essential and ensuring it remains within the appropriate range for the seeds you’re germinating.
Maintaining Humidity Levels
Importance of Humidity
Maintaining adequate humidity levels is crucial for seed germination, as it helps prevent seeds from drying out and provides a favorable environment for their growth. Depending on the seeds you’re germinating, different humidity requirements may apply. It’s essential to research the specific needs of your seeds and provide the appropriate humidity levels.
Utilizing a Humidity Dome
A humidity dome is a cover or enclosure that traps moisture around the germinating seeds, creating a humid microclimate. It helps to retain moisture in the germination containers and prevents rapid evaporation. The humidity dome can be made from recycled materials or gardening suppliers. Ensure that the dome is adequately ventilated to avoid the build-up of excess moisture and mold growth.
Misting Techniques
Misting the germination containers can also help maintain humidity levels around the seeds. Using a fine mist spray bottle, gently spray the surface of the germination medium without disturbing the seeds. This adds moisture to the environment and helps to keep the seeds adequately hydrated. However, avoid over-making, as excessive moisture can lead to fungal diseases or damping-off.
By following these comprehensive techniques for seed germination, you can significantly increase your chances of success in starting your garden from seed. Remember to match the seeds with the appropriate climate, choose high-quality seeds, and ensure optimal conditions for germination. With proper preparation, watering, temperature, light, scarification, stratification, germination containers, medium, bottom heat, and humidity, you’ll be on your way to growing healthy, vibrant plants from seeds. Happy gardening!